VEE BOTTOM/S-DECK THRUSTER.
A couple of months ago, with the impending doom of a wave starved Spring/Summer season looming, my mind drifted to a place of higher wave counts without the need to ride a longer board. I’ve always been a staunch rider/believer in performance-based thruster Mini Mals, but sometimes when that wave period is under say 8 seconds, you really need something with a touch more foam under your feet to catch the waves a lot easier and keep speed on such a slow moving, and unhelpful wave face. This, coupled with the swelling of crowds with warmer water and the generally “busy” season in Byron Bay, makes you always wanting for something with foam, but can still rip a nice cutback when the section does indeed present itself.

A mate had been riding a board he had brought back from the States. It had a much wider, straighter planshape tail than I was used to seeing in a board 7 foot long. More of something you’d see on a short, small wave groveller. I had also been riding a few boards shaped by another friend that all had wider tails, so I was addicted to the instant get-up-and-go feeling of boards with wider surface areas in the tail, which generally equates to more planing area and you guessed it, more float.
So with this in mind, naturally I began speaking with Hutcho on what I was thinking. Mentioning that sometimes these HP style Mini Mals lacked the surface area in the tail necessary to carry you through the fatter sections at The Pass. Obviously when the section was right they were incredible, but there’s a lot of downtime at The Pass on certain swells. Times when you need the board to do most of the work in carrying you through a bit of deeper water or wobbly section. I had always envisioned something that blurred the lines between my shorter, wider tailed “grovellers” and these narrower, more HP based Mini Mals. In my mind, it would be the perfect board for The Pass. The best attributes of a longboard; paddle power, trim speed and glide. But then adding the performance benefits of a thruster setup, concaves sitting outside the main, deep vee bottom planing surface underneath.

After showing Hutcho the 7 foot board my mate had brought back from the States to give him the idea of the rough plan shape I was contemplating, he instantly knew what curves he wanted to use. Our Fat Arse Wombat nose curve template is now over 25 years old, and one we use on quite a few of our boards in the current range, it’s a pretty mental curve that’s able to be extended or shortened depending on what you’re trying to achieve. From there it was a bit of back and forth with a few more different curves to get the right amount of curve in the middle of the board while running into the much wider tail block than we were used to. We eventually narrowed this tail block a touch as it was creating too much of a straight around 18″ from the tail. Narrowing it up slightly (1/2″) allowed us to gain a much nicer, more flowing curve from the mid point (1″ forward from centre) down past the fins and into the diamond tail.

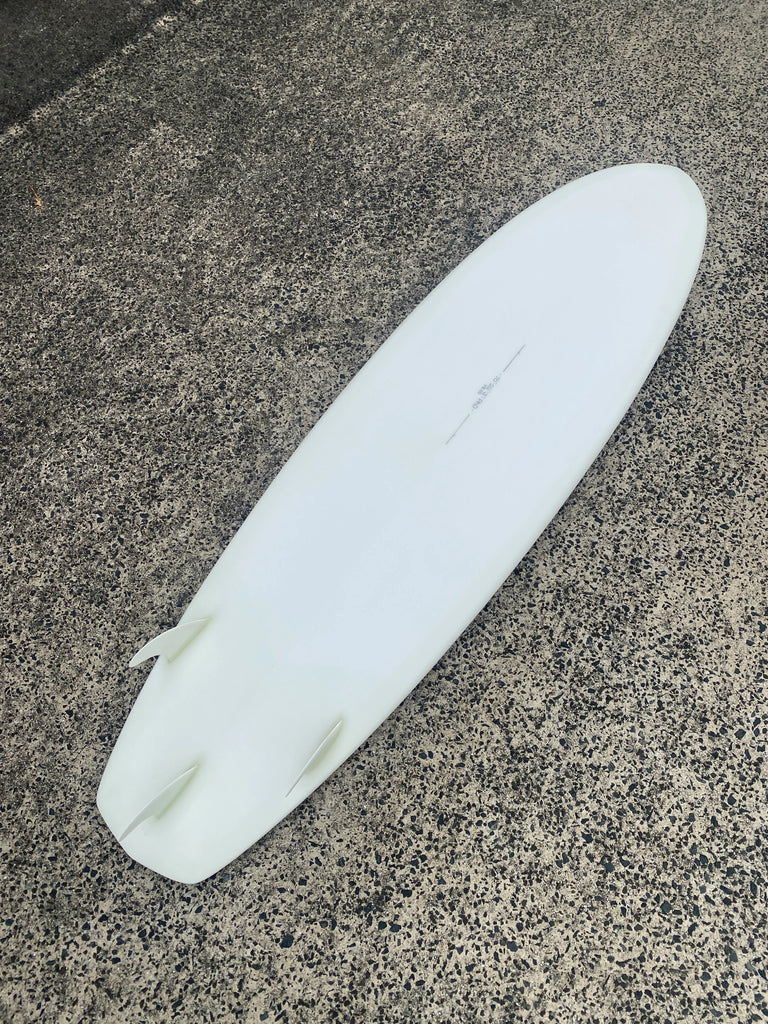
After both being happy with the outline, saw is put to foam, the board begins to take shape. Hutcho then goes about smoothing out any inconsistencies from his planing, which let’s face it, there’s bugger all. Dude has been using a planer for over 50 years. Any vee or concave to be included in the board is usually planed in before the outline is cut out, saving time and effort further down the track. Hand shaping teaches you efficiency, and if each step is done in the correct order, it means less time cleaning up and streamlines the whole process. The pronounced Vee bottom is now much more evident that the outline has been cut out, the light of the shaping bay really helping show it against a straight edge ruler.


This Vee bottom is really going to help this board go from one rail to the other when coming off the bottom and laying into a cutback, and really helps that rail to hold onto the wave face when things get critical through that turn. The board is planted into the wave face, as convex creates hold and sticks itself to the water, whereas a concave will have the board planing on top of the water and will generally lose traction, when pushed hard, on such a wide tailed board.

Next comes the deck roll, and the amount of S deck which we are trying to incorporate into the design. Maximum float was the main agenda for this design, with it’s wide tail block and generally wider outline. So having the thickest part of the board under your feet while surfing makes sense, but this can sometimes be very hard to achieve when sorting out the thickness distribution. Not a difficult task for Paul though, who’s early designs in the late 60’s all had S-Decks, from the early single fin Egg’s to the very early twin fins.


Lastly, we talked on the rails and kept a nice, neutral and forgiving rail throughout most of the front half of the board, with our usual tucked edge running from just past half way down through the tail. We don’t want any super hard resin edges causing release, we want the hold that having a tucked edge gives you. A very common misconception.
Thruster setup was chosen as the first iteration and these marks were figured out the same way I do on most of our boards, visually with a set of thrusters placed on the board and spaced out so it looks “right”. That setup is then measured so it can be marked onto the board. Obviously if they feel horrible then we can just sand off the glass on fins and have another go. But in my experience, if they look right visually, then they generally surf right too.
As the blank was stringerless to begin with, it was the only Burford 8 foot MA we had at the time, we decided to laminate the board in 6oz all over to give it some rigidity. Wider laps are also utilised to help the overall board to gain strength from the laminated C section on the rail.
As this one felt incredible from the get go, I decided we would be scanning it onto our KKL machine with the analogue probe (old school!) and that means we can now replicate another accurately and utilise a quad setup in the next one, something that I think will work quite well with the wider tail block and surface area in the tail. Probably start with Hanalei Q2’s, as they’ve been feeling amazing in a few other boards I have been riding earlier in the year.


